Just another TRU EDDL Sites site

Month: October 2019

Week 8: Legal and Ethical Issues – Activity 1: Create a Digital Safety Plan

Schools have a duty of care and must ensure they are able to safeguard children, young people and staff. – Becta. (2010).


Having a Digital Safety Plan should not be taken for granted irregardless of our students age and how often they surf the internet.  There are a number of safety risks that are present in online learning and our students must be aware of them.  As teachers we are responsible for the safety of all our students and online safety is no way different.  It our duty to eliminate, reduce, or mitigate potential digital risks that our students may encounter.  For my Technology Integrated Activity, the below are a few potential risks that my fourth graders may encounter and will need to be aware of:

  1. Privacy – recording and uploading each other without consent (parental and/or school’s) is not acceptable.
  2. Using Computers Responsibly – never click on links or open an attachment without knowledge of who it is from.  If in doubt, ask?  Be aware of what you download, post, share or like.  It is your responsibility to be mindful of the things you do and participate in, as it will be a reflection of you, your class and school.
  3. Online Activities – these should be monitored so that students can be guided in completing the required tasks in a safe and enjoyable manner.

My Responsibility

  1. Ensure that the school’s network is secure and that antiviruses are up-to-date.
  2. Receive parental and school’s consent to make videos and upload them for future usage.
  3. Educate students on cyber bullying, so that they are aware that it is not ok to treat others online disrespectfully nor is it ok to participate in anything that makes them feel uncomfortable.
  4. Monitor and observe students keenly when performing online tasks.
  5. Educate parents on ways in which they can safe guard their children’s digital activity at home.
  6. Manage screen time.

Children are enthused with technology and the risks in online learning increases daily.  Equipping our students with the skills and knowledge is an ongoing practice.  This is the only way these risks can be managed and behaviours that are safe and responsible can be promoted.

References

Becta. (2010). Safeguarding children online. Retrieved from http://courses.olblogs.tru.ca/
eddl5101/files/2012/10/safeguarding_children_online_risks_poster.pdf

https://www2.gov.bc.ca/gov/content/erase/online-safety

https://www.google.com/search?online/learners


Week 7: Models and Barriers to Adoption and Integration – Activity 1: The Diffusion Simulation Game

Never doubt that a small group of thoughtful, committed citizens can change the world.  Indeed, it’s the only thing that ever has. – Margaret Mead

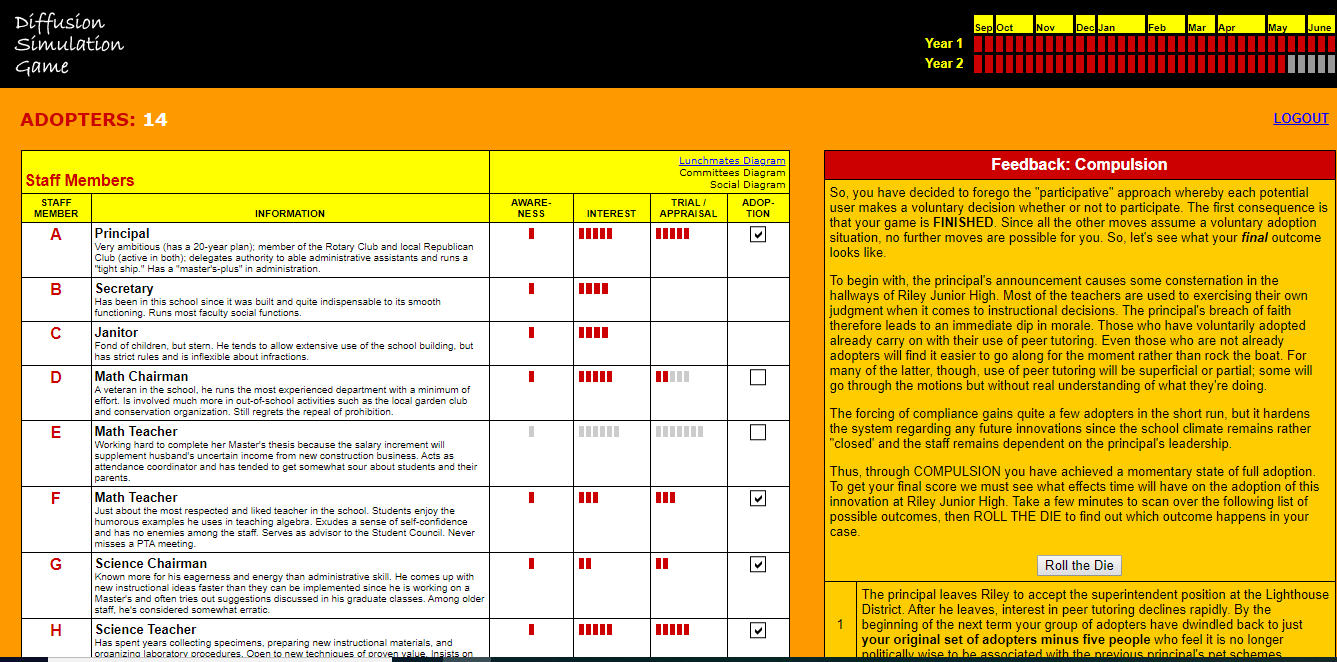
The “Diffusion Simulation Game,” was very captivating for me.  I played 3 rounds of the game back to back and started a fourth round, but did not get to finish due to time constraint.  In my first round I ended with zero adopters and so I decided to do another round right away.  Second round I ended with 14 adopters and the third round I ended with 11 adopters. Below is a snippet of my highest results:


My Experience Playing the Game

In the first round I was totally unaware and didn’t pay much attention to the amount of time of the school year it would cost me to engage in the diffusion activities.  So, I just randomly selected an activity with the hopes of getting it all over and done with in the quickest possible time.  Oh! bad on my part, a true representation of my technology acceptance character, as I did not “perceive it as being useful.”  However, due to my adaptive skill, I quickly reviewed the game’s rules and headed into my other attempts, which I found myself getting hooked to each time I played, as it allowed me to think outside of the box and paid attention to small details.  I truly enjoyed this activity.

Number of Times Taken For Me to Be Happy

I was very happy on my second trail with the number of teachers and staff I convinced to adopt a new technology and also very pleased on my third.  Hence my reason for starting a fourth trial, just to see if I could beat my highest score.

Strategies that Worked for Me

The strategies that worked best for me were:

  1. Awareness – getting to know the staff members and learning their strengths and weaknesses allowed me to strategize my approach.
  2. Seeking Assistance – getting help from staff member(s) who were deemed as being influential is a great strategy.  It helps to gain the remaining staff’s trust and interest.  
  3. Interest – having the staff curious and knowing the benefits of the new idea was of great value.
  4.  Demonstration – this was a key factor in gaining the trust and winning over staff members’ interest, so that they were willing to give my idea a try. 
  5. Presentation – this gives an opportunity to reach a wider group of individuals when presenting new ideas.

Strategies that Did Not Work 

The strategy that did not work was “Confrontation.”  This strategy usually brings animosity and resent among any group of individuals. Compulsion is also another strategy that must be taken into carefully consideration.  I used it in my second attempt because I believed that having 14 adopters out of 18 members was a great move.  I believe this was so, because it was my intention to give all staff the opportunity to try the new idea being introduced so that they could integrate it into their classroom or tweak it to suit their needs.  This is a strategy that has to be trod carefully, as it can be viewed by some staff members as forceful or that they are being bullied.

Lessons Learnt that Will Influence My Approach in Integrating Technology in My Practice

Playing DSG reinforced, knowledge of your staff is key in gaining success when introducing a new idea/technology.  The time of year at which new concepts  are introduced as well, plays a very important role in how well it will be received, executed and evaluated.  Demonstrations and workshops are great ways of introducing new tools, it’s usages and benefits.  These strategies can be very time consuming and can take up a lot of the school year, but if it is introduced and shared on an accessible website and/or document it can be well received and useful.

References

https://diffuse.sitehost.iu.edu/dsgdebrief.pdf

https://diffuse.sitehost.iu.edu/dsg.php

Technology Acceptance model (adapted from Davis, 1989)


Week 6 – Assignment 3: Exploring Digital Solutions

Please click on the link below to view my web presentation on my exploration with my selected tools that are appropriate for solving the instructional problem I explained in Assignment 2.

https://www.powtoon.com/online-presentation/eQjB80vatxj/?mode=movie#/

For those who were wanting to view my presentation at their own pace, please see the pdf version before.  Thanks 🙂

Small-Cooke_M_EDDL5101_A3


Week 6 – Activity 1: Connect with a Classmate

Skype is a telecommunications application that specializes in providing video chat and voice calls between computers, tablets, mobile devices and smartwatches via the Internet. Skype also provides instant messaging services. Users may transmit text, video, audio and images – Wikipedia.

I was unable to connect with a peer for this activity.  However, since I have numerous experiences connecting through video conferencing to facilitate communication with work colleagues, family and friends, I will use those experiences to share my thoughts.  Over the years I have used a lot of video conferencing to share ideas with colleagues and most recently to keep in touch with my family and friends since I migrated.  My main video tools are Skype, Facebook Messenger, Tango, Whatsapp and Viber.

Video conferencing tools are a great way to facilitate communication and collaboration between students and teachers.  It promotes:

  • Socialization – provides opportunities for students to socially interact with people outside of the classroom.
  • Anytime Access – in real time.  It connects people and objects that are not in the same physical environment.
  • Less travel – allows guest speakers to stay at their office to give their presentation to a number of students/audience within a given day.
  • Communication – through images, text, audio and video.  Providing better clarity of ideas being conveyed.

Skype is easy to set up and navigate.  However, there are a few things to take into consideration when using Skype or any other video conferencing tool; especially within our classrooms.  Some of these are but are not limited to:

  • We need to have consent from parents to allow the use of Skype in our classrooms, since it is an online communication system.
  • Skype in the classroom is not like regular Skype, which means that there are some limitations to what projects you can do during class time.
  • Resolution – the webcam has to be at least 2 – 3 megapixels for the effectiveness of picture resolution.
  • Speed of Internet Connection – having your WiFi cutting in and out can be a disaster and takes away from your presentation.  Images will be scrambled and audio will delay if the internet speed is slow.

Skype is synonymous with “video chatting” and allows users to make video and regular calls (Purwal, S.J. 2011).  One great feature of Skype is that it allows you to tweak your webcam settings for better quality pictures.  The option to turn off the video camera during a presentation, especially if it outside of the work hours is also a great benefit if you are not the presenter.  This allows you to multi-task in the comfort of your home.

Reference

Purwal, S. J. (2011, August 9). Luditte’s guide to online video conferencing.
Retrieved from https://www.itbusiness.ca/news/luddites-guide-to-onlinevideo-conferencing/16347.

https://sites.google.com/a/my.maryvillecollege.edu/anna-owens-educational-technology/home/project-1/skype-in-the-classroom.

https://en.wikipedia.org/wiki/Skype

Week 6 – Activity 5: Your Thoughts on Alternate Learning Spaces

Second Life is an online virtual world, developed and owned by the San Francisco-based firm Linden Lab and launched on June 23, 2003 – Wikipedia.

For this activity I did not meet up with any classmate, as I believed people used different username as I did myself, since I did not want to use personal information on a gaming tool.  I’m not a gamer and I did not find this tool appealing or interesting for my learning needs or teaching needs.  Maybe this is so because of the limited amount of time I had to navigate the tool and to fully understand it usage and benefits.

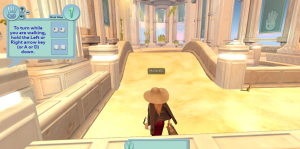
The tool downloading and initializing were pretty quick and easy, but finding my way around the space within the tool was very frustrating, I bumped into walls frequently, was totally unaware of how I was to walk at first.  I used my laptop to performed this task, so I thought it was just to drag my mouse to get me moving. All clicking and dragging my mouse did was turned the page/view.  I still am unable to use the fly option (which I wanted to use to get me around faster), as it is grayed out and did not allow me to gain access.

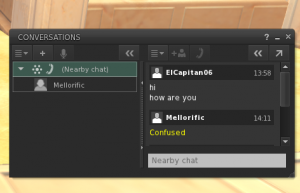
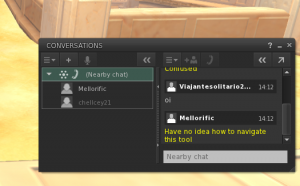
I honestly had no idea at all what to do and what are the real benefits of this tool.  I had someone saying hi in the chat room which was a bit creepy for me since they just said “hi how are you?” which followed by another communicating in another language and then disappearing from the chat room.  I guess this tool is only beneficial if you start off with a partner, so that we can actually meet up at the same time to walk through what I termed as a “amaze” together.

One great feature that I like about this tool was the fact that it was created in 3D, which is very appealing to children as it gives them a more real life experience.  Using second life as an alternate learning space will need to be fully mastered by me first, before I would think of introducing it to my students and/or colleagues. I will definitely visit this tool and spend quality time in learning how to navigate it and explore the ways in which it can be used to enhance and/maximize my teaching learning environment.

References

https://secondlife.com/

https://en.wikipedia.org/wiki/Second_Life


Week 5 – Activity 3: Exploring Digital Solutions – Asynchronous Teaching and Learning Tools

Asynchronous learning is a student-centered teaching method that uses online learning resources to facilitate information sharing outside the constraints of time and place among a network of people. – Wikipedia.

The specific type of tools a teacher uses to integrate in each lesson should be in alignment with their objectives.  The learning outcomes by the end of the Technology Integration Activity I have planned in previous weeks are; students should be able to:

  • define the term simple machines.
  • group at least 5 examples of simple machines correctly.
  • work cooperatively in groups to share aloud what they have discovered after investigating and watching related videos.
  • associate and use relevant vocabulary of terms such as force, push and pull.
  • identify and categorize correctly at least 5 simple machines within their environment.

My Asynchronous Tools of focus for this lesson would be:

Flipped Classroom – Short video lectures  will be selected and placed on the schools’ website so that students can view them before as well as after the class session to guide students on what will be focused on during the session and/or reinforce content be taught.

YouTube – The use of videos via YouTube is a great way to show the students the types of machine that belong to each group of simple machines.

Digital Library/Resources – Builds on students skills such as knowledge of usage, navigation and communication while completing required task for the lesson.

References

Cabi, E. (2018). The impact of the flipped classroom model on students’ academic achievementInternational Review of Research on Open and Distributed Learning, 19 (3), 202-221. https://doi.org/10.19173/irrodl.v19i3.3482 (CC BY 4.0)

EDUCAUSE. (2012). 7 things you should know about flipped classrooms. Retrieved from https://library.educause.edu/~/media/files/library/2012/2/eli7081-pdf.pdf

eFront. (2016, February 10). Using videos in your eLearning courses [Video file]. Retrieved from https://youtu.be/AopF8T43Fno

https://en.m.wikipedia.org/wiki/Asynchronous_learning


Week 4 – Activity 5: Share Your PLN

Education doesn’t stop when you get your teacher’s license.  We need to follow the profess we make/give to our students that they are life longer learners – because so are we. (Tom Whitby – Founder of #edchat).

Purpose of my PLN

  • Instant feedback.
  • Connects with other educators and stakeholders.
  • Sources tools and resources to support learning and teaching needs.
  • Personalizes your own learning.
  • Accessible and flexible.
  • Excels your learning.

Planned Usage of My PLN

  • Share and garner ideas.
  • Participate in collaborative online learning.
  • Make new connections by meeting new educators.
  • Seek new point of views on topics.
  • Communicate with a diverse group of educators.
  • Find information and support.
  • Model how to be a master learner.

Platform to Build My PLN 

Since this is my first time building a PLN through media, I’m going to keep it simple by starting with Twitter (even though I have other networking tools – Pinterest, TED Talks, YouTube, LinkedIn).  Having one platform to start with will give me the opportunity to decipher the experts and/or organizations that will give me the most out of my desired purposes and/or to meet my objectives.  It will also allow for better time management, as with my already loaded day, I really do not want to be sucked into all the creative ideas or informative talks that all my networking tools have to offer.

tweet, twitter icon

Formation of My PLN

I started out with my #lrnchat to begin my activity.  Through this chat group, I have added some of the members from the group based on their profiles and interests which are in alignment with my objectives.  From the connected educators video, I was very impressed with the founder of #edchat, so he has also been added to my network, as well as #sd61learn and #sd61Inclusion, to build what I’m expecting to be an awesome PLN.

Strategies Used to Start Building My PLN.

In building my PLN, I’ve used the below strategies and will definitely alter it as I go along to tailor my needs and making it as effective as possible.  Please feel free to choose any and/or all of the below.  It can also be used as a guide in prompting your thoughts as it relates to your desired needs.

  • Search Tool Icon – this allows the narrowing down of exact and/or keys words of what is needed.
  • Say Hello in Chat Groups – especially if it is your first time. Doing this allows others to recognize your presence and welcome you, so that it doesn’t feel weird to you or pointless.  This way, you’ll also be prompted to get engaged.
  • Follow Educators You Admire – this allows and/or promotes participation, since they will most likely be posting things of your interest.
  • Devote Allotted Time to Your PLN – set a specific time of day and the amount of time to be spent on your network(s) so that interaction with your connection can be done regularly.

While networking, remember two things, PLNs are 1) only valuable if people contributes and 2) you’ll never find the exact insights you need if you don’t try. (Elizabeth Trach – Professional Writer and Blogger).

References

M.-A. [DevPro PD Flipped]. (2012, October 18). What is a PLN – Marc-André Lalande’s take [Video file]. Retrieved from from https://youtu.be/hLLpWqp-owo

U.S. Department of Education, Office of Educational Technology [Office of Ed Tech]. (2013, September 18). Connected educators [Video file]. Retrieved from https://youtu.be/K4Vd4JP_DB8

US Department of State, The Bureau of Educational and Cultural Affairs, American English. (n.d.). Developing your virtual personal learning network (PLN). Retrieved from https://americanenglish.state.gov/resources/teachers-corner-personal-learning-networks-plns

www.schoology.com/blog/personal-learning-network-pln-benefits-tools-and-tactics

Week 4 -Activity 4: Share Your Tweet Chat Experience

Twitter bird logo 2012.svgTwitter is a micro-blogging and social networking service on which users post and interact with messages known as “tweets”.  (https://en.wikipedia.org/wiki/Twitter).
Twitter has never been an interest of mine based on hear-says of how this platform works.  So, for this assignment, I had to create an account and learn how to use it.  Thanks to “Introduction to Twitter and Twitter Chats in education [Video file], Karlin, M. (2016, March 23),” I was able to navigate this tool fairly well.  As Lalande, 2012 puts it, in most participating chats I am always a “lurker.”  Most of the social media sites that I have an account with (I mainly use Instagram and Facebook), are mostly used to stay in touch with friends and keep up with the lives of celebrities.  My YouTube account on the other hand is used for educating myself on areas of interest.

Tweet Chat Chosen 

I decided to follow #lrnchat, as this group’s focus is on “how people learn.”  Getting ideas from a wide range of people on how they think and/or believe people learn is very useful, especially teaching an “all inclusive group of students.”  Ideas shared and learnt can allow and/or promote creativity, which in turn allows you to tweak others ideas to match the needs of your students based on their individuality.

Tweet Chat

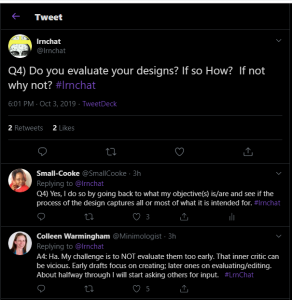
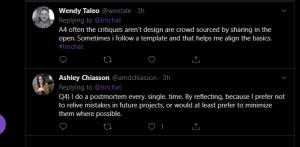
I participated in today’s session (10/03), with the theme: Your Design Process.  I found the tweet chat to be very informative in such a short space of time (1 hr.)  However, the purposes of re-tweets and hashtags are yet to resonate with me.  I believe that if you are following a particular group, then what is the point of re-tweeting or having to hashtag?  I guess one of the reasons is to get it posted on your personal feed instead of the group’s feed.

Participation from Others

The group is open to everyone and can be participated in, every Thursday at 5:30 p.m. PST.  They can be found by:

  • Searching #lrnchat
  • Hit the follow button

To ensure you are in on the action, turn on the notification for the group.  This way you are reminded before the session begins and you will be notified as soon as the session starts.  Notifications are also given when questions are asked, answered and comments posted, liked as well as re-tweeted.

Tweet Chat Experience

My overall experience was very good.  The #lrnchat group seems pretty friendly, as they welcomed newcomers (me in this case) and also assured the new tweeters that it’s ok to ask for help if needed.  One key observation as well, was the introductory activity which seems to be a norm that the organizer begins with each week, which is in the form of a question – “What did you learn today? If not today, then this week?”  Questions were pretty short and very relatable.

Lesson Learnt

“Creativity is a natural outcome of our cognitive architecture, while process isn’t.”  Also a Stephen King quote “write with the door closed and edit with it open.”

Future Sessions 

Yes, I plan to keep participating in future sessions, so that I can build on my navigating and participating skills for this site.  After all, I want to move out of the “lukers” group to the group of participants :).

PS:  Please feel free to follow me on Twitter @SmallCooke

References

Karlin, M. (2016, March 23). Introduction to Twitter and Twitter Chats in education [Video file]. Retrieved from https://youtu.be/TOD-E3LGzHU

Lalande, M.-A. [DevPro PD Flipped]. (2012, October 18). What is a PLN – Marc-André Lalande’s take [Video file]. Retrieved from from https://youtu.be/hLLpWqp-owo

https://en.wikipedia.org/wiki/Twitter

Powered by WordPress & Theme by Anders Norén